this is my second tutorial step by step for leopard installation guide, simply follow the images, if you don't know what to do then use the written explanations, if you are still having problems comment here or use my mail address and i will try to help. also try accessing the first guide located here, perhaps a better explanation can be found there and of course use the troubleshooting menu item in order to solve more complicated situations.
this guide follows the Leo4Allv3 beta it is a Leopard 10.5.2 distribution.
first burn the Leo4Allv3 (beta or final) on a DVD as slow as you can, insert it and boot the computer, first screen you will see is this, press any key:
first burn the Leo4Allv3 (beta or final) on a DVD as slow as you can, insert it and boot the computer, first screen you will see is this, press any key:

next you will see a black and white text screen, unlike other distro Leo4All never display the gray apple screen.

after loading you see abeautiful sunset background loading


first screen appears select your install language and press continue arrow


next you see a progress bar screen


and a welcome screen with "More Information" button,


press continue,


accept the license agreement that scrolls down,


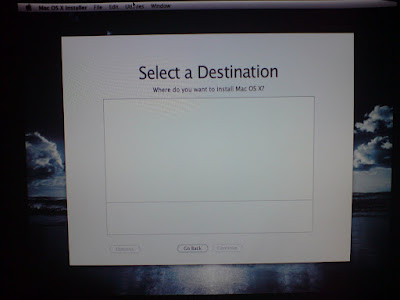
next comes the "Select Destination" screen that allow you to select the destination hard drive, if you see a blank screen like this, it means you don't have any suitable hard drive or partition to install on (yet). if you see a hard drive that you want to install on, click on it and press continue, also read on from "Boot Step" images.

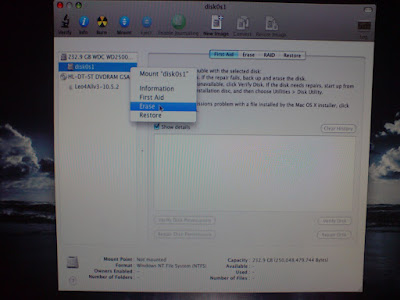
next press on the menu item Utilities and select "Disk Utility"


this screen will appear, identify on the left the hard drive you wish to install leopard on, and right click it and press "Erase"

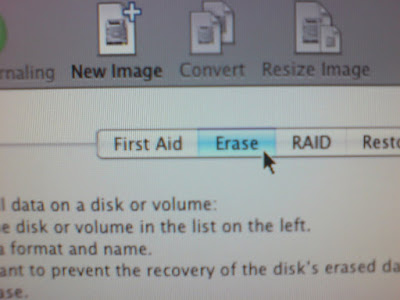
it can be also a partition (not a hard drive) like in this image,


you may also click on the hard drive or partition to select it, and from the center tabs select "Erase" tab

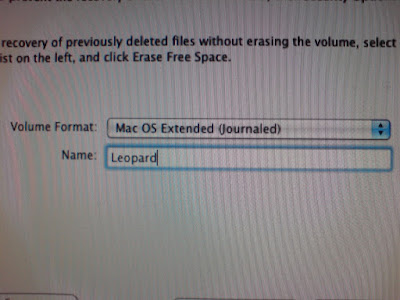
after selecting "Erase" option (ether way) you need to select the "Volume Format" this is the file system you will use, select Mac OS Extended (Journaled),
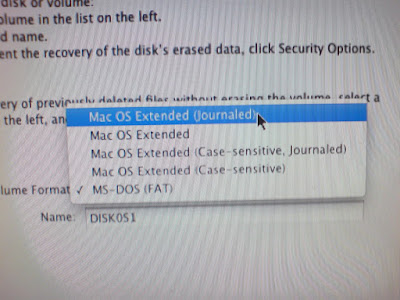

at the "Name" field enter the name you would like to call that partition, it will be the name at the darwin boot menu, and the Icon of your main HD on the desktop, try not using space, special characters or non-english characters.

next press the "Erase..." button


and again on the "Erase" from the scroll down window, to confirm


notice the progress bar at the lower part it will take about 5 seconds or so,


when the progress bar disappear, choose "Quit Disk Utility" from the "Disk Utility" menu


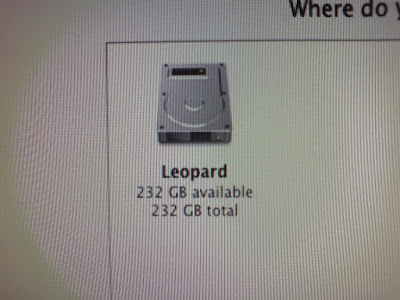
you will return to the "Select Destination" screen only this time the recently deleted hard drive or partition will appear with the name you entered.

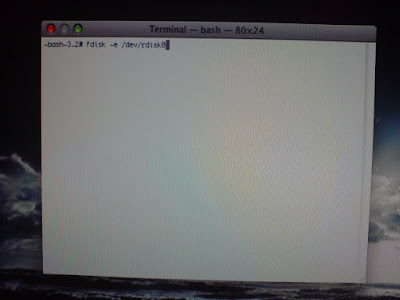
Boot Step:from the Utilities menu select the Terminal menu item and this window will appear,write: fdisk -e /dev/rdiskX where X stands for the hard drive number you are going to install leopard on (starting from 0 as the first drive 1 as the second etc.)

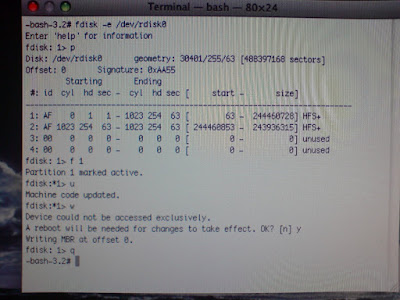
follow the commands written here and appearing in the image (a more detailed explanation can be found here start at point 4 or follow next lines):p and press enterit will display all available partition on the hard drivef Y and press enterwhere Y stands for the partition number you want to install leopard onu and press enter,w and press enter,if it gives a warning and asks a question like in the image (A Reboot will be required) press Y and press enter,q and press enter (to quit).

next select "Quit Terminal" from the Terminal menu,


at the "Select Destination" screen select continue it will lead you to the Install Summary screen looking like this:
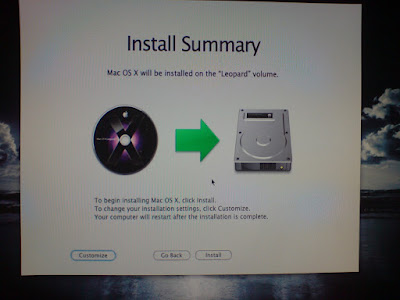

notice the "Customize" button at the lower left corner of the screen,


it allows you to preview and change the packages installed with leopard, at first installation you would like to leave the defaults, if things go wrong you can reinstall and start changing the selected packages, starting with selecting different kernel until it will install correctly, if your after installation the screen looks black the select different Video kext from the "Third Party Drivers", try many combinations until you will nail it.


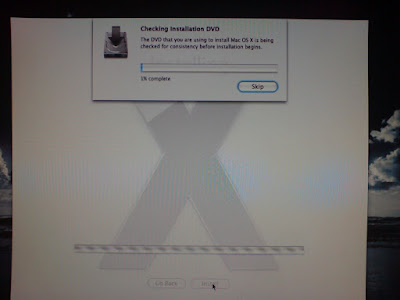
after pressing done in the Customize screen, and pressing Continue in the Install Summary screen, you will see this progress bar checking the validity of the DVD, (making sure it is legit and every bit is readable), you can press skip if you trust your dvd,

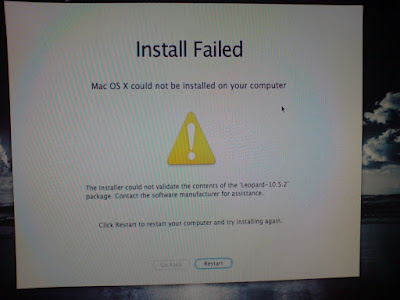
if the dvd is damaged or dirty or not burned correctly then you will eventually get to a screen saying installation failed since the dvd could not be validated looking like this:


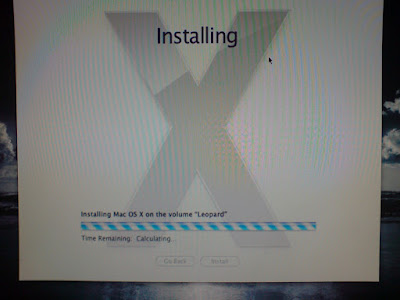
if validation is OK then the Installing screen with the progress bar will appear and will take about 10-15 minutes.

at the end of a successful installation you will reach this screen that will count back 25 seconds till reboot, you may press reboot yourself or wait for the timeout to reach and the install will reboot itself


after reboot you will see this screen (note no welcome video, such a shame), press ok


next screen will ask you to press the key next to the left shift, press it once


the screen changes and ask you to press the key next to the right shift key, press it once,


now you will be notified that your keyboard has been identified, press Continue


at the next screen select your country,


if you can't see yours, you may use the lower "Show all" checkbox, it will reveal all countries available,


next select your keyboard second language,(again you may use "Show all")


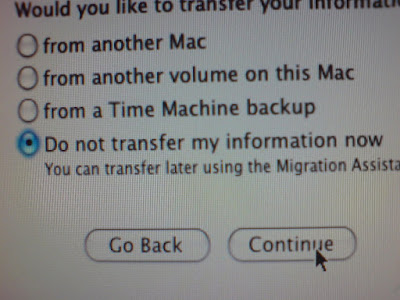
this screen helps you to upgrade from previous mac (via fire wire, network, or other partition on this mac),
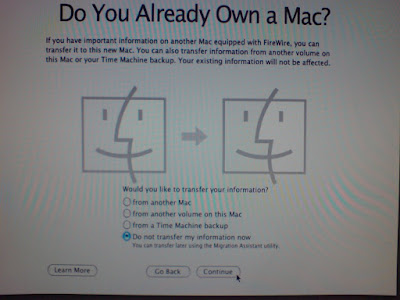

if you don't own previous mac or you don't want to migrate your user home directory then select "Do not transfer my information now" and press Continue,

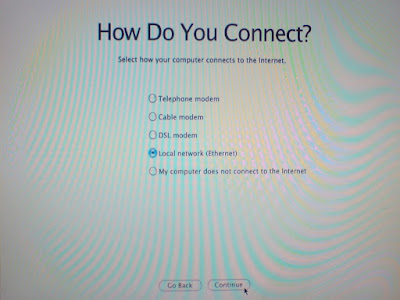
next screen ask you to select the way you connect to the internet, choose your method or you can leave it for now and install network later,

if you selected an internet connection, then you see this next screen asking you for the parameters, such as IP Address, router address (use the help of your ISP support)

if you supply faulty configuration you will see this scroll down that allow you to press cancel in order to retry entering the data or ok, to continue without internet setup,

next you will be asked to enter your apple ID and password, leave it empty and press Continue,

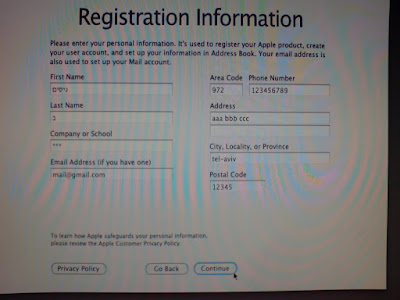
next screen asks for your registration information, fill what ever you want, please note that if you have internet connection then this data will be used to send registration to apple,

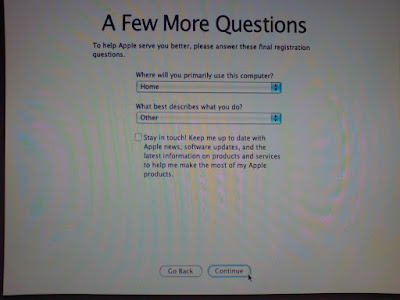
next screen asks you to supply information of where and how you are going to use this mac, i select home and other, and uncheck the "Stay in touch" checkbox,

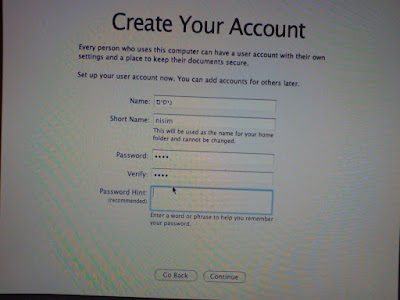
at the "Create your account" screen you setup a user that will be used to login into this mac, enter your username password and hint and press Continue,

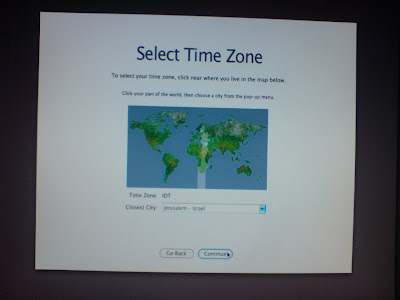
at the next screen select the time-zone by clicking on the world map at your area and tuning using the bottom drop down menu, and press Continue,

last, adjust the clock and time, press "save" and continue,


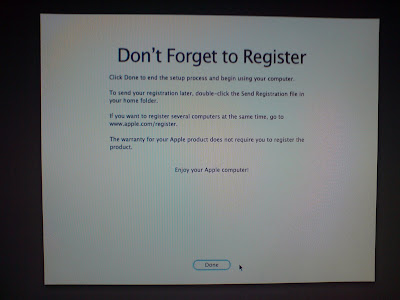
next screen will remind you not to forget registering your data with apple, (since you are a hackintosh member, please forget), press Done,

and at last you should see your leopard home screen,


there can be many problems along the way, do not forget to use comments and Troubleshooting from the blog menu.
Enjoy.
No comments:
Post a Comment